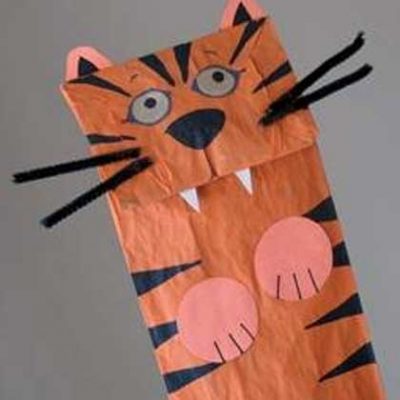
Make this cute paper bag tiger for a zoo-themed party, as a Cub Scout project, during the Year of the Tiger, or any time.
PAPER BAG TIGER PUPPET
What you’ll need:
Paper lunch bag
Orange and black paint
Black marker
Black, white, and orange construction paper
Gold paint pen
Scissors
1 black chenille stem
White craft glue
Glue stick
Pattern
How to make it:
- Paint outside of paper bag with orange paint and let dry.
- On a piece of black construction paper, use the gold paint pen to draw 2 circles, about 1 inch in diameter.
- Cut around the circles, leaving a border of black paper, cut each end out to a point to resemble the almond shape of an eye. Use the pattern for the eyes as a guide.
- Dip the handle end of a paint brush into black paint and using a circular motion, at the round blacks of the eyes onto the gold. Let dry.
- When bag is dry, add tiger stripes around the bottom of the bag (the head) and down both sides. Add a nose and facial features as well. Use the pattern as inspiration for drawing on the face. Use black paint to fill in the stripes.
- While paint is drying, cut the ears and paws out of orange construction paper using the patterns. Color in the center of the ears with black marker. Use a glue stick to attach the ears to the back of the bag and the paws to the front.
- Cut two teeth from white paper and use a glue stick to attach them beneath the flap.
- Glue the eyes to the face using a glue stick.
- Cut chenille stem in to four pieces and use white craft glue to attach two to each side of the face. Let dry.