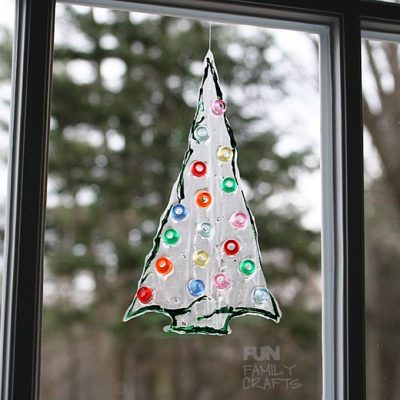
Beaded Christmas Tree Sun Catcher
Sun catchers are always popular with the kids! This is a great weekend project, or a fun project for a classroom. It will take a couple of days because the glue has to dry overnight. The actual making of the craft takes about 20-30 minutes. On the second day you’ll simply add a hanger and you’re done!
You will need:
- Parchment paper
- Always Ready Clear Gel Tacky Glue
- Transparent pony beads in various colors
- Green craft paint
- Toothpick
- Needle and thread
How To Make It:
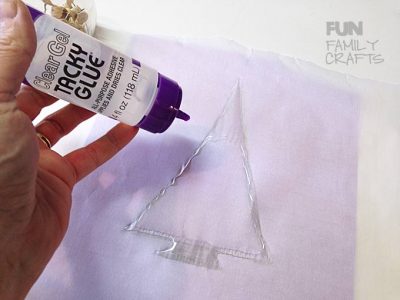
- Place a piece of parchment paper onto the work surface. If you would like to move your project while it is drying, use push pins to attach the parchment to a piece of foam core board. Draw a simple triangle shaped tree onto a piece of paper and slide it underneath the parchment. Trace around the tree using clear tacky glue. Fill in the tree shape generously using the clear tacky glue.
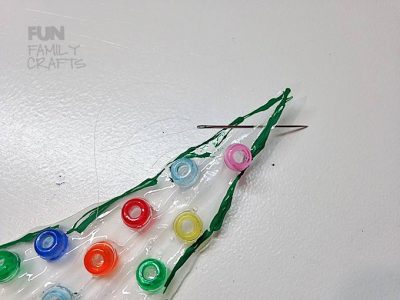
2. Place pony beads into the wet glue to act as Christmas ornaments or lights. Allow to dry for about an hour.

3. After an hour, use a toothpick to “draw” green paint around the border of the drying glue. At this time, look at the tree and see if there are any spots that are thinning or even forming holes. This can happen as the glue dries when there wasn’t a thick enough application added. Simply add more clear gel tacky glue to those spots and allow everything to dry overnight.
4. Use a needle and thread to add a hanger to the top of your tree. Tie the string in a knot and hang in a window!
This project was created by Amanda Formaro.