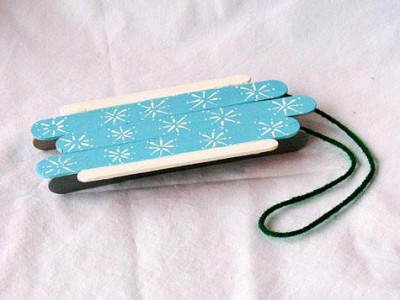
Craft Stick Sled
Make this fun replica of an old wooden sled. The starburst design and beautiful colors make this little sled an adorable winter activity.
What you’ll need:
- 5 jumbo craft sticks
- 2 craft sticks
- 2 miniature craft sticks
- White craft glue
- Yarn
- Light blue and white acrylic paint
- Toothpick
How to make it:
- Paint three of the jumbo craft sticks light blue and let dry. Paint the other two jumbo craft sticks with silver paint and let dry. Paint the two craft sticks with white paint and let dry.
- Decorate the light blue craft sticks with snowflakes. Dip a toothpick in white paint and draw starbursts with it, then dot the end of each line.
- Glue the three light blue sticks together, side by side. The outer two should line up and the middle one will stick out above the other two by about ½”.
- Glue on the two white craft sticks, putting one on each side of the light blue craft sticks. Line the white sticks up in the center of the light blue. When dry, turn over and glue the two miniature craft sticks in the opposite direction of the larger ones. This will help reinforce the sled and hold it together better. Glue one at each end.
- Take the two silver jumbo craft sticks and glue them to the bottom of the sled as the blades. These sticks should be standing on end. You may need to hold these for a minute or so as the glue grabs and sets up.
- Glue a piece of yarn to the bottom side of the sled as the pull cord.
Helpful Tips:
- You can paint the craft sticks after putting the sled together if you prefer more of a challenge.
- Change the design to your liking; perhaps try painting a snowman instead of snowflakes.
- Craft sticks are available in your local craft supply store in a variety of sizes.
This project was created by Amanda Formaro, originally for Kaboose/Spoonful.