Thumbprint Ladybugs
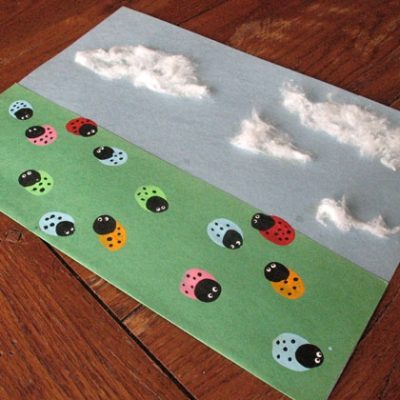
Create a field of colorful thumbprint ladybugs under a blue sky. This project is easy and lots of fun for spring or summer.
What You Need
- 1 sheet green construction paper
- 1 sheet light blue construction paper
- 2-3 cotton balls
- Acrylic paint: light blue, red, orange, light green, pink, black and white
- Toothpick
- Glue stick
- Scissors
How to make it
- Place the light blue construction paper on the work surface. With glue, cover the bottom third of the paper where the “grass” will be. Place the green paper on top of the glued area and press down to seal. Turn paper over and trim off all but 1 inch of the green paper. Apply glue stick to that remaining 1 inch of green paper, and then fold it up onto the blue paper and press to seal to make a clean bottom edge.
- Turn paper back over. Use the glue stick to “draw” on some clouds in the sky. Pull apart cotton balls and attach to the glue to create the clouds.
- Dip thumb into colored paint and press thumb onto green area of the paper. Repeat in different colors and press onto different areas of the green paper. Let the colored paint dry.
- Dip only the tip of the thumb in black paint and press onto the front of each of the colored thumbprints to create the ladybug heads. Use a toothpick dipped in black paint to add the ladybug spots.
- Wipe the black paint off of the toothpick. Turn toothpick around and dip the clean end into white paint to dot on the eyes. Let dry. When white paint is dry, use toothpick dipped in black paint to add the pupils.
Helpful Tips:
- Instead of creating the eyes with paint and a toothpick, you can glue on tiny googly eyes.
- Because thumbprints are definitely keepsakes, be sure to write the child’s name and date on the back.
- For added color, allow children to create flowers with their fingertips along the grass horizon line.
This project was created by Amanda Formaro, originally for Kaboose/Spoonful.