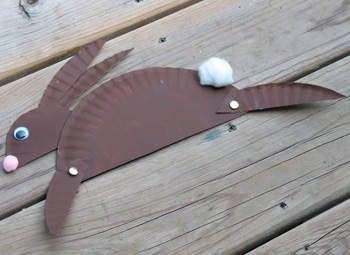
Paper Plate Rabbit
This cute rabbit made from paper plates has moveable parts! It can be made as a spring craft, Easter or even Chinese New Year during the Year of the Rabbit.
What You Need
- 2 9”-paper plates
- Brown craft paint or markers
- 2 paper fasteners
- Scissors
- Pen
- 1 cotton ball
- 1 small pink pom-pom
- 1 medium googly eye
- White craft glue
- Pattern
How To Make It
- Turn the paper plates upside down and paint brown or color with brown marker. Let dry.
- Cut one paper plate in half, then trim off an additional inch from the straight cut edge.
- Using the pattern as a guide, cut out 2 ears and 1 of all the other pattern pieces. Use the natural curve of the paper plates when cutting out each piece. Save the scrap pieces for another project or discard.
- Position the back leg over the bottom right side of the body. Holding the two pieces together, poke the tip of a pen through the plates then insert a paper fastener. Repeat this step with the front leg as well.
- Attach the head to the back of the body using tape. Attach the ears to the back of the head using tape.
- Glue cotton ball on as tail and the pink pom-pom on as the nose. Attach the googly eye using white glue as well.
Helpful Hints
- You can save the excess bits of paper plate to use in a future project.
- A white pom-pom or a white construction paper circle can be used in place of the cotton ball.
- Craft foam can also be used to substitute for nose and tail supplies.
This project was created by Amanda Formaro, originally for Kaboose/Spoonful.