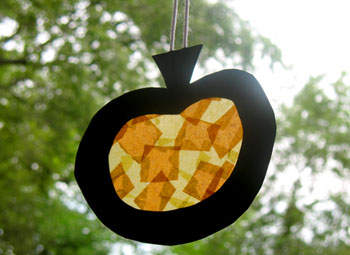
Faux Stained Glass Pumpkin Window Hanger
This faux stained glass pumpkin project looks very pretty hanging in a sunny window! It’s easy to put together for kids of any age.
What You Need:
- Heavyweight self-stick laminating film (i.e. Con-Tact paper)
- 2 sheets black construction paper
- Tissue paper: yellow and orange
- Glue stick
- Scissors
How You Make It:
- Draw a pumpkin shape on a sheet of scratch paper.
- Expose about 15” of laminating film by removing the backing (leave the film on the roll), leaving the sticky side facing upward. Place your sketch underneath the laminating film, positioning it toward the loose end. You will be folding the sticky side onto itself when you are finished.
- Cut or tear squares of yellow and orange tissue paper. Using the pattern underneath the film as a guide, fill in the space with tissue paper squares, overlapping as you go. You want to completely cover the center of the pumpkin.
- Use scissors to cut the film off the roll. Fold the empty side over the tissue paper pumpkin, sandwiching it between both sticky sides. Press out any air.
- Stack two pieces of black construction paper on top of one another and place your pumpkin sketch on top. Cut out all three pieces at the same time.
- Remove the pattern, then cut out the interior of the construction paper pieces, leaving about a 1/4″ border. You should have two identical black pumpkin frames.
- Take the tissue paper pumpkin and trim close to the edge of the tissue paper border. Place the frame onto around the tissue paper pumpkin and trim more if needed.
- Use glue stick to attach the frame to both sides of the pumpkin.
This project was created by Amanda Formaro, originally for Kaboose/Spoonful.